Back in November we sent avid Detroit commuter and all-season cyclist, Chris Cunnington, a set of Grip Studs to test out and here is what he has to report so far.
Thanks to the guys at Fat-bike.com I was sent some Grip Studs traction studs to evaluate. I have previous experience with 26×2.25 mountain bike studded tires, Nokian Extreme 294, with 294 studs in each tire. The 26×3.8 Surly Larry tires on my Rohloff-equipped Schlick Northpaw are a whole different ball game, so installing studs on these tires (which is a new experience in itself) resulted in a very different riding experience. I ride 10-15,000 miles per year all over Detroit; of course, maybe only 3 or 4 months of that will be on studded tires!
Step 1: Stud Installation
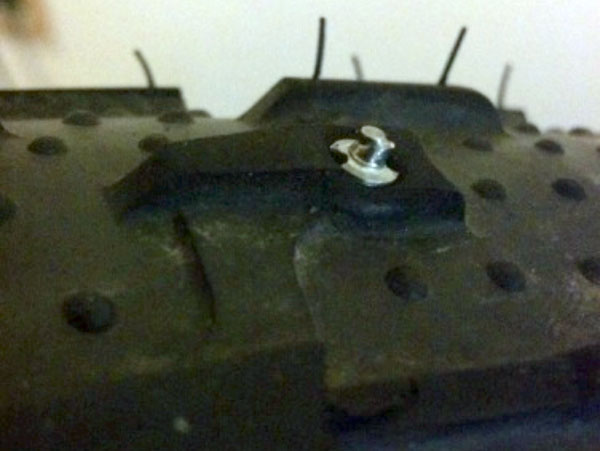
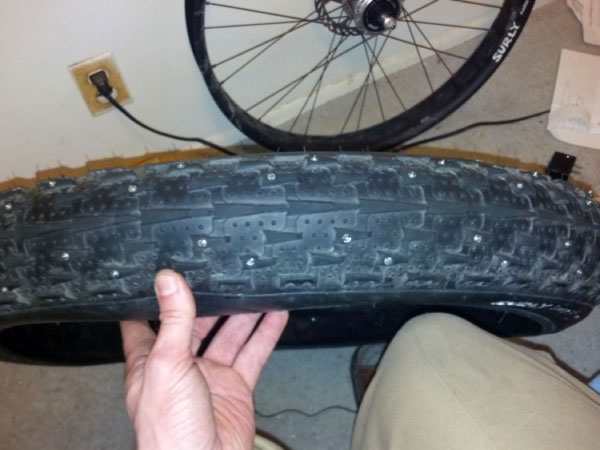
First, I had to decide what pattern and how many studs to use on each tire. I was provided with 250 Grip Studs, but wanted to choose a reasonable pattern that used the same number of studs on each tire. The Larry has a center row of lugs (which I opted not to stud) and four rows of staggered lugs on either side of the center, each with 50 lugs. I opted to stud every other lug on these four rows, which yielded using 100 studs in each tire.
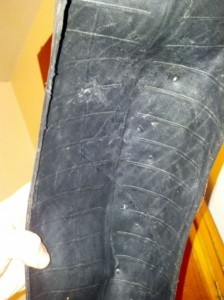
Above is the completed tire…but let’s back up to the installation process, and what I learned.
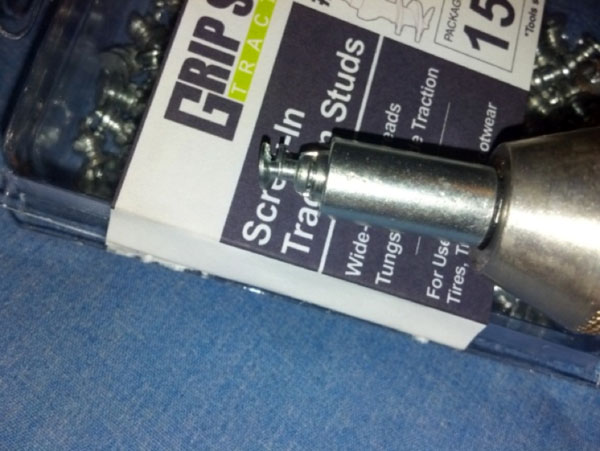
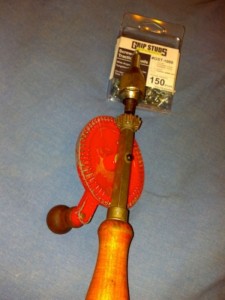 1. My cordless power drill turned out to be broken, which ended up being a good thing. I dug up an old hand crank drill and chucked the Grip Studs installation tool in. I found that I could easily drive the studs in too far even by hand (these tires do not have much extra thickness in the casing), so a power drill may have caused a disaster.
2. I had extra tubes, so I initially tried driving the studs into an inflated tire…bad idea! The tire flexes too much and makes the stud walk around while you try to start it. After puncturing a tube accidentally driving a stud in too far, I dismounted the tire and found a better method: put something hard and flat under the tire and push hard with the drill to get the stud to drive in straight where you want it. I initially tried holding a 35 pound iron dumbbell between my legs and stretching the tire around that; this turned out awkward because the dumbbell was too smooth and the tire would move sometimes. You could generally tell when the stud was driven in far enough because it would make a different sound in the rubber and the crank on the drill would be slightly harder to turn; it took me a bit of time to learn this. The first tire took me almost 3 hours with all of the planning and working out techniques. For the second tire, I decided to use a wooden 2×4 for the hard, flat surface; this worked much better, and I finished the second tire in under an hour.
3. Due to my learning curve installing the studs, and that these tires have thin casings, making for no flat protection, I wanted to put a layer of Gorilla Tape inside the tire before mounting it on the rim with a tube. One problem did arise here: for some reason (I think maybe I let the tape get too cold) the tape would not stick to anything but itself. So, I made a very wide strip with two pieces of tape and set it between the tube and tire to provide a little protection. I am also using 26×2.4-2.75 DH tubes, which are 2.25mm thick; the Surly 26×4.0 fat tire tubes are only 1.0mm thick, offering significantly less flat resistance. The smaller tubes have no problem expanding to the full size of the 3.8 inch tire. I am looking for a better puncture flat resistance solution; as yet I find no thick casing puncture resistant fat tires.
Step 2: Riding
My previous studded tire experience was on much smaller tires (26×2.25); with these, the ride on pavement was very similar to the ride on 26×2.25 Schwalbe Marathon MTB tires. On ice, these tires gripped such that ice felt like pavement. The only problem was certain kinds of snow; perhaps you are accustomed to the thick, sort of slushy snow that has been chewed up by car tires and feels like mashed potatoes? That stuff was impossible to get traction in with the smaller tires; this is where the 3.8 inch tires will hopefully shine. So far, I have tested the big tires favorably in sand and wet mud that I would have washed out on with the old 2.25s. So far, I have encountered just two instances of snow with fat tires (with Grip Studs installed). The first was a light accumulation of powder that smaller tires would have been fine on. I can say, however, that the bigger tires spacing the studs farther apart does seem to make for a more confident stance on the ice; I could swerve around on purpose and not feel the tires slip. Certainly, these Grip Studs are just as good as the tungsten carbide studs that are molded into commercially available studded tires, such as Nokian.
The second snowfall of the season proved to be more interesting. It delivered maybe 8-10 inches of snow in spots, more in drifts, and some variety in snow types. I still have a bit to learn in riding technique to stay upright in some types of snow. I had to stop and walk only a few times, and fell down only once.
Hard packed snow: no big deal, packed snow/ice mix underneath seemed hard enough for Grip Studs to grab on to. It is not a big deal to shift up and go faster on this snow. Narrower mountain bike tires also had no trouble on this.
Light powder, less than 3 or 4 inches: can also blast through this, studs grab pavement underneath quite well, same as narrower studded mountain bike tires; can even get by without studs on this, provided there is not ice underneath.
Light powder, more than 3 or 4 inches: if already moving, can be navigated. I find that shifting to a lower gear and maintaining high cadence is very helpful. Also, standing up strategically to shift weight to front tire seems to help right fishtailing. Narrow mountain bike tires have a tough time in this, and fat tires still require careful balance and effort. I also find that I have not yet worked out an effective technique to shift my weight forward to get rolling in this; if I stop, I find myself walking to where the snow is packed and not as deep. I am not sure the studs do much for this, but tread pattern seems important. I became quite aware that the Surly Larry with its small lugs did not shed the snow well, which may have contributed to difficulty in deeper snow. I will be trying more aggressive tires soon.
Thick, heavy, snow with a paste or mashed potatoes consistency: If this is not very deep, even the 2.25 Nokians could handle it. But make it deeper and add various sizes of tire ruts, and the narrow tires quickly became ineffective. The wide tire with studs, on the other hand, could be coaxed into being stable on this. As with deep powder, I found slower speed, lower gear, and high cadence to be very important. If I tried to go too fast, even the studded Larrys would wash out, but high cadence and going slow seemed to promote balance and give time for the tires to shed some of the snow and for the studs to grip. This kind of snow was encountered on freshly “plowed” roads. Tire ruts were not a big deal as long as the pasty snow layer was not to deep around the ruts. For example, in the deeper snow where a commercial truck had made a turn, the curved ruts would take the Larrys for a ride; perhaps a more aggressive stance on my part could have made these ruts more passable. What I did find though was that going sideways was more often than not recoverable with the Larry/stud combination; I could not say this on the narrower Nokians. Standing up and leaning forward was helpful when the back tire started to slip. I expect that tires I should be trying soon with much larger lugs should fare better in this type of snow. Getting rolling on this snow was easier, thanks I think to the studs and their wider spacing on the fat tires. Once moving, going through deeper sections of this snow was usually doable with a slow and steady pace.
The fat tires also seem to enhance the studded tire experience; I will have more to report later in the winter when we undoubtedly get more snow and ice. Also, better installation instructions might have helped, but stubborn people like me would probably still have to mess it up to learn the best way to do it; once I got a good technique and rhythm, it was easy. As tire choices open up in this fat tire size, I could see myself eventually getting another set of Grip Studs. However, assuming they last like the studs on the Nokians I had, it will be a few seasons before replacements are needed….especially since you can remove and reuse the Grip Studs.
Thanks for the report Chris and we look for an end of the season wrap up later in the year!

i’ve got Dillingers and the only thing that has bested me is any powder over 8″ deep…
I have 175 grip studs in each 4.7″ fat tire on a moonlander. I ride stuff that would otherwise be impassable. Iced single track, the “grease” when the top dirt thaws but ground underneath is frozen, Ice on the lake, snowmobile trails & ski trails. The studs are awesome & I wouldn’t be riding near as much without them. Thanks Collin at grip studs.
John