As owner of a new garage (and house), I’ve been trying to sort out the bike storage situation. I figured I should get it right the first time instead of the hodgepodge that inevitably comes to the surface. In the past, I’ve used the ubiquitous garage utility hooks, Gladiator bike hooks, and Delta Cycles hanger. They’ve all had their pluses and minuses. In the end, I haven’t been all that happy with any of them. Problems with getting bikes in and out from the heard without interference, scuffs on the walls, wobbly bikes, loosening hooks, etc. So as I was contemplating my options, the cosmic planets aligned and I got a call out from FBdC HQ that there was a storage rack that needed testing. Enter the Steadyrack . .
–On a side note – I was also sent a Rack Stash and for the record, I agree with everything Spinner said here. Well built, easy installation (I installed mine for horizontal rack storage), secure fit, and it gets the rack out of the way. But on to the review at hand . . .
Steadyrack is a family owned and run Australian company that has been selling racks for 10 years. Racks are made out of high quality steel and UV treated plastic. Several models are available to cover all your wheel size/width needs – Classic (Road/MTB up to 2.4”), Mountain Bike (2.1-2.8”), Fender (up to 2.4”), and Fat (up to 5.0”). Racks come with a rear tire rest and all necessary hardware to mount (including masonry installs). During the test I also tried out a few other bikes with my Plus bike (29×3.0) the only other one that really worked. Other narrower tire widths were just too wobbly in the rack (and obviously why they make different models). Right out of the box you can tell this is a well built, sturdy rack. It’s hefty and it’s rated up to 77 lbs. The major features of the rack are the 180 pivoting action and the fact that it can fold up. More about these things later.
Measure Twice . . . 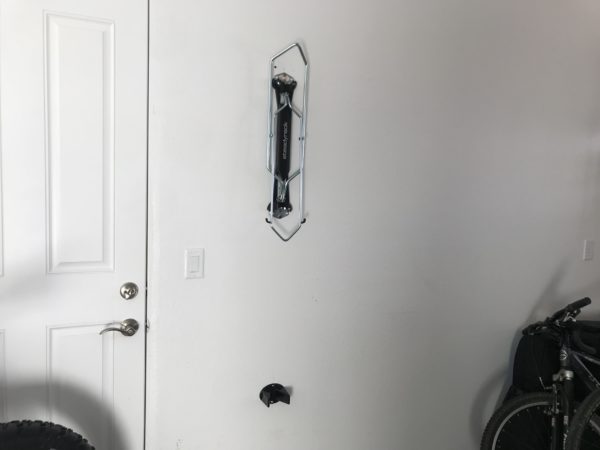
Mount Once . . .
(note the rack in the folded up position)
Installation was straightforward and the directions are outlined on Steadyrack’s website (both in text and video form). In summary, you place the bike on the ground in the rack and measure how far it is from the wall to the top most mounting hole then add a few inches (to keep your rear tire off the ground when in the rack). Then lining up with a wall stud, transpose that number onto your wall, mark where the mounting hole will be, predrill, and then mount the rack. Like I said, pretty straightforward. Having a stud finder, level, and drill driver make it even easier. Normal stud placement is 16” on center so if you want to place the racks closer, you would have to mount them to something more solid since they would pull out of the drywall since I don’t think drywall anchors will holdup long term. Steadyrack states that 14” in the minimum distance between racks. You could probably do 12” but I think that may be pushing it and not provide enough room for the pivot to be useful. Of course, MTB bars are a lot wider than drop bars so that will impact things as well so alternating the heights of the racks might be warranted (and what I plan to do in the future).
Plenty of room for wide tires 
4.0 Vanhelga for reference
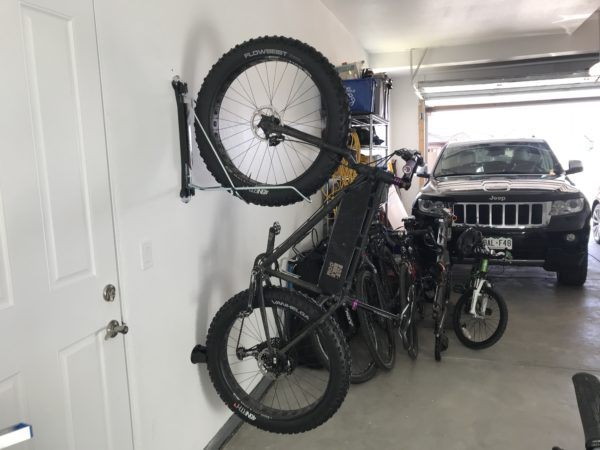
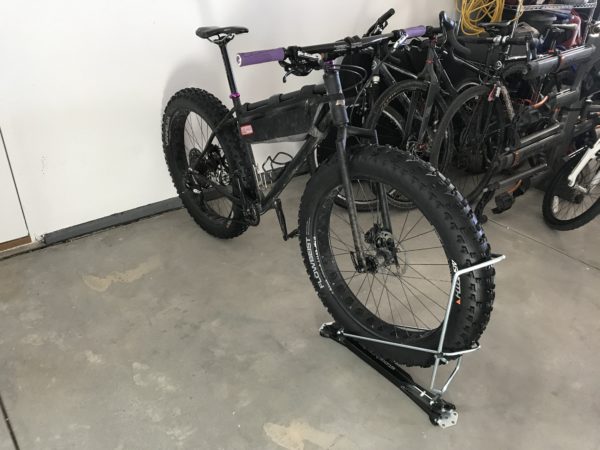
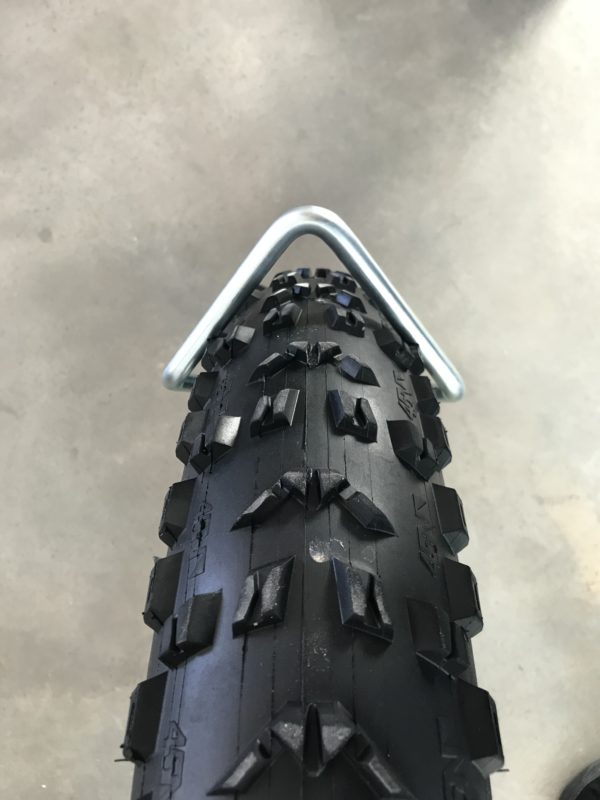
Use of the rack is straightforward as well – simply roll the bike on its back wheel, push the front wheel into the rack, and the bike just pops into the tray. Getting the bike out is just as easy – just grab the handlebars and roll it backward out of the tray. The front tire tray has plenty of room to accommodate the fattest of tires. Once in the rack, the rear wheel sits in the tire rest, which keeps your tires off the wall and acts as the lower pivot point. Which brings me to my only complaint about the rack – the tire rest isn’t big enough for fat tires to fit in to despite this being the Fat model. My 4.0″ 45NRTH Vanhelga just fit (my 29×3.0 fit just right). Wider tires will likely sit on top of the tire rest vs. in it. With that said, it does hold the tire in place well enough when pivoting. During my time with the Steadyrack, the rear tire hasn’t slipped off while pivoting the rack.

4.0 Just Fits 
3.0 Just Right
Where the Steadyrack really shines compared to other bike racks is the 180o pivoting action. The pivoting allows you to move adjacent bikes out of the way for easier access. This also means you can mount the bikes closer than you could otherwise and still provide easy access to the bikes. This is has been my biggest gripe about other storage options I’ve tried and the Steadyrack solves this issue in spades. Also of note, is that the rack can actually fold upon itself as well (see pic above). For normal usage, I’m not quite sure how useful this feature would be but for some reason if you needed to get the racks out of the way you could.

Its a jump to the left 
And then a step to the right
I will admit the Steadyrack had been on my radar so I was excited to give it a test drive before outlaying the cash for 8 racks. With that many bikes, space is an issue, even with a new garage. Storing the bikes closely spaced makes getting them in an out a hassle. Undoubtedly, your bars catch on another bike or pedals end up in spokes. Overall, I’m really impressed with the Steadyrack – easy to install, easy to use, and with the ability to pivot bikes out of the way, solves some storage issues when looking at keeping a multi-bike stable organized and easy to access.
You can find out more at https://www.steadyrack.com/
Hi, do you think that I can use a Fat Rack for a MTB (29×2.5) or I absolutely need to buy a MTB Rack for MTB? The winter I use my Fatbike and the summer my MTB. I would like to install only one Steadyrack in my garage.