So you have a sweet set of super fat wheels for that snowbike of yours but they seem a bit heavy, Sure you could get some of the new generation of rims like the Rolling Darryl’s or some Uma II’s and re-lace your hubs onto those, but why waste a set of perfectly good rims? In this Post I’ll walk you through drilling out a set of fat rims.
What you will need.
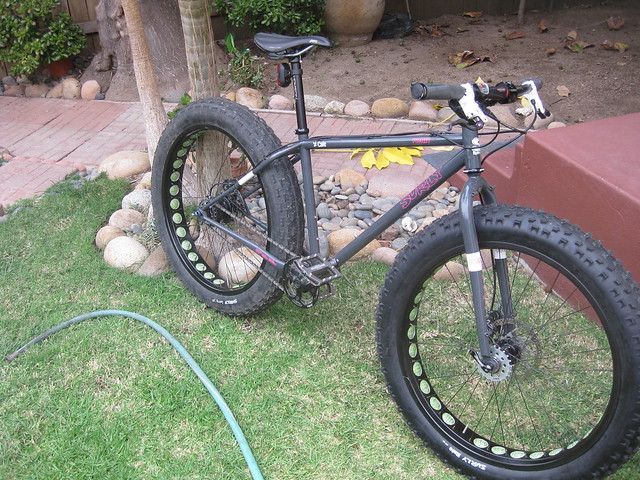
1. A set of un-drilled rims or an undrilled wheelset.
2. An awl or some other scratching tool so you can lay out your drilling pattern
3. Hole saw of the appropriate size ( I used a 1.5in hole saw)
4. A drill or a big drill press
5. A smaller drill bit (I used 3/16)
6. A small File or Dremel tool
7. Beers for afterwards
8. About and afternoons worth of time
9. Some Gorilla tape and optionally some cool lookin ribbon.
Part 1 – Layout
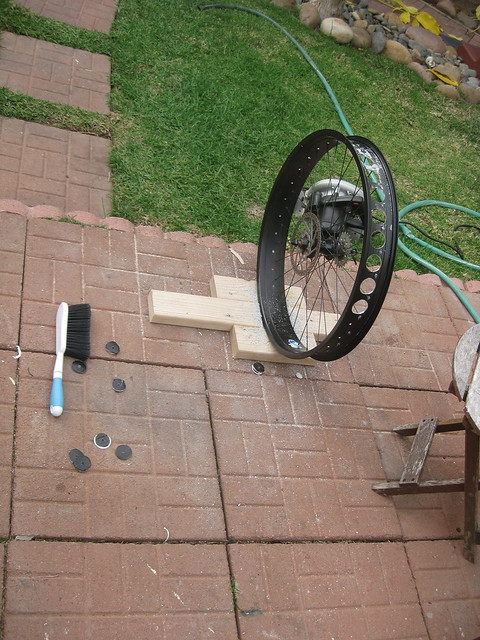
First measure halfway between each spoke and mark it with an awl (23mm inside to inside of the nipples on Gracefull Fat Shebas)
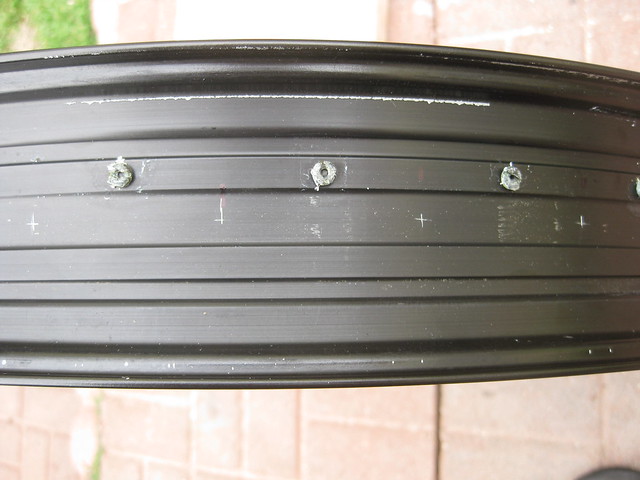
I also marked the center of the rim as well, basically I’m trying to stay between the center ribs of the rim to keep the wheel as stiff as possible. with a 1.5 inch hole on a Gracefull fat sheba you have 2-3 mm of room to play with before you hit the side rib so you do have a bit of margin for error.
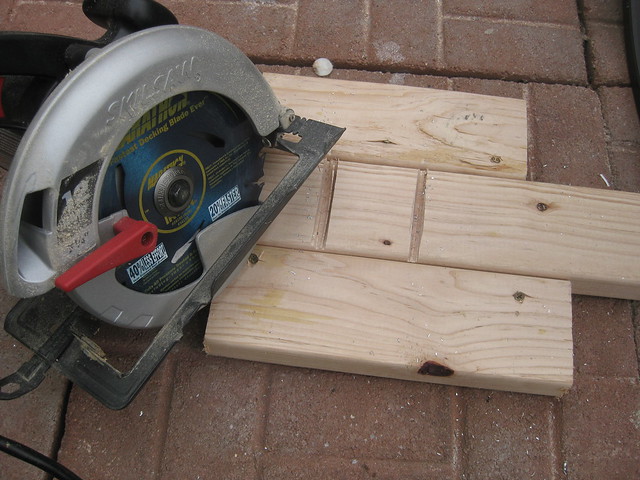
First things first, I made a little rim holder by cutting slots in a 2×4 scrap so my wheel would stay in one spot while drilling, not strictly necessary but very handy.
Next up you throw a 3/16 or some sort of slightly smaller bit in your drill and drill out pilot holes
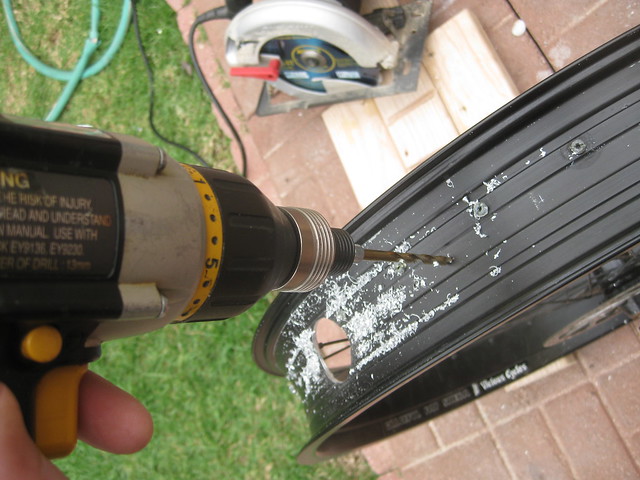
Its probably easiest to drill out all the pilot holes first but I did drill one test hole to make sure everything looked good (although if it does not look good I suppose the rim is toast anyways)
pilot holes drilled all the way around
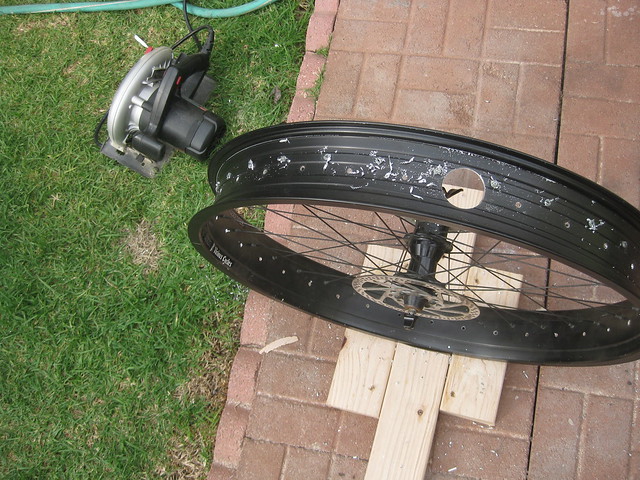
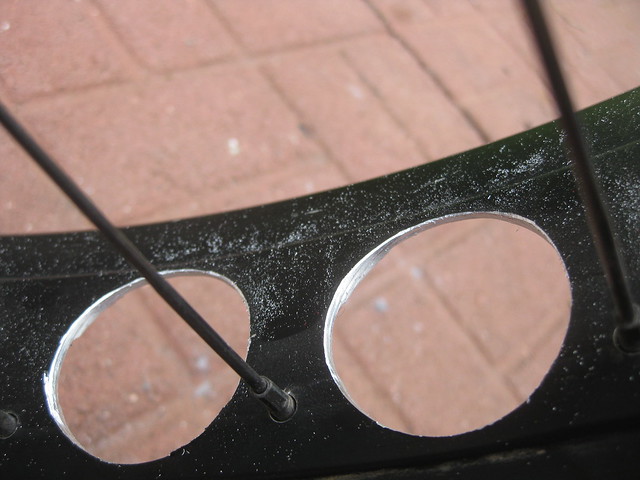
After that its time to take your hole saw and drill baby drill.
Make sure you take out the leftover rim sections before drilling the next hole or you will end up with a useless holesaw in short order.

Also watch out for the spokes when you punch through, a hole saw will kill a spoke real quick, I pushed a bit too hard on one and nearly snapped a spoke, I had to replace it since it got pretty mangled but really as long as you are careful it should not be an issue.
Once you have the Rim drilled you need to clean up the holes with a file or dremel tool.
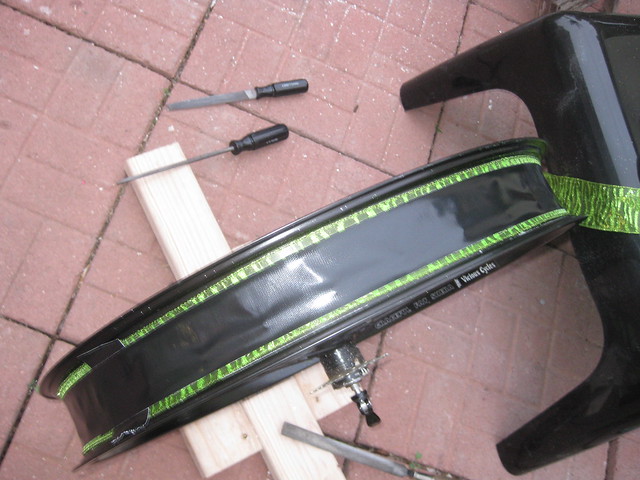
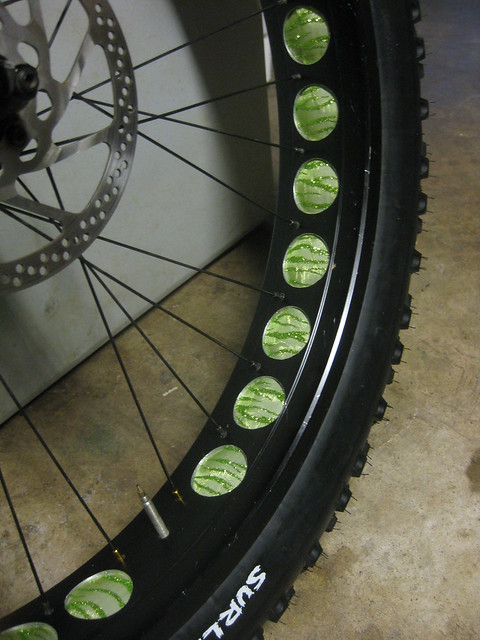
All you have to do now is wrap the rim with either just Gorlla Tape or add some sweet ribbon for a bit of color. I used this glitter green stuff I found at Wallgreens.
Wrap it around the wheel and secure with a small piece of tape. Then wrap it with Gorilla Tape – use half strips of tape to cover the edges.
Once you are done you can double check the true of your wheels if you want ( I didn’t need to re-true anything) and re-install the tire.
Now Do it all again with your other wheel!
Now you have some sweet Drillium wheels, I saved over 200 Grams per wheel doing this so in my mind its definitely worth the effort.
For other Bikebacking related DIY check me out over at Cales Travels
Thanks! I’ve always wondered how to do that. Well done! Looks great.
But, I’ll never find the courage to take power tools to my Sheba’s.
is it possible to do large marges this way?
It is possible but you would need to use a smaller hole saw. Ive also seen people cut the center channel out of large marges. If you search mtbr you can find a few posts about it.
Cale, as usual you have stepped up and gone beyond the norm, thrown out the owner’s manual and said “fuck it, I can do better”. well done sir!
ps- I just picked up a Nate for the rear and now I really can’t wait for some Wisco winter wup-ass to get opened up!
My Mukluk came with Shebas and I”ve been looking around mtbr at some ideas on how to do this. Great instructions. I like the rim holder
Nice article, Cale. I drilled out my FlatTop 100s after doing some math and figuring out the most square inches I could remove and still have a wheel left over. As it turns out, smaller holes allow for more metal to be removed, depending on your spoke pattern and patience. I used Rolff paired spoke design, which helps make more space between spokes. Here’s a photo of the finished product:
https://picasaweb.google.com/lh/photo/ldzpBWZf8mXZBd9CyAhiRc16PJtzVotN71sNX2xUDLI?feat=directlink
I’ d say you are right and not right all at the same time. not right in that one large hole will always remove more material than multiple smaller holes, but right in the fact that you can get holes in more spots with smaller holes. so I suppose the correct overall answer is to use the largest possible holes in as mony spots as possible while still maintaining rim Integrity. Either way your Rims look awesome, any idea how much weight you saved over a undrilled rim?
My supporting Maths.
Surface area of a circle is calculated as {pie}R{squared}… “R” being the radius of the circle. Radius being half the distance of the diameter…{pie} roughly equals 3.14159265358979 (that’s all I have memorized, but it is an indefinite number in actuality).
Let us use a 6mm and a 12mm diameter holes for comparison…
6mm diameter equates to a 3mm radius. {pie} x 3{squared} = 28.27 (rounded)
12mm diameter equates to a 6mm radius. {pie} x 6{squared} = 113.10 (rounded)
113.10/28.27 = 4.00
Thus; we can see that twice the diameter equates to four times the surface… Transversely; a diameter half the size of another equates to one-fourth the surface.
Yeah, you’re right, Cale. I should have been more specific. The combo of two different sized holes on my wheels provided the highest area I could remove on my wheels, in comparison to one big hole, like the FlatTop 100s used to come drilled out as, with a normal spoke pattern. I used 1 and 1.25 inch holes, saving 310 grams. (If I remember correctly, they were 840g… ?)
Yep, 840g drilled FlatTop 100s. http://www.joshspice.com/2011/01/few-more-bike-pics.html
OH MY GOD…that is beautiful man. How long did THAT take?
Id say 3-3.5 hours give or take.
So gorilla tape is what i need to stop blowing out my tube lol perfect
Nice writeup, Cale. Does the 200g savings per wheel include the weight of the ribbon and Gorilla tape (assuming all that’s necessary on an undrilled rim would be a strip of Gorilla Tape just wide enough to cover the spoke nipples)?
yes it does it was actually 223g weighing the wheel before and after (both with rim tape installed.) the additional ribbon is 15 grams per wheel.
Thanks for sharing this. I can’t decide whether to DIY or purchase. This takes most of the guess work out of it though.
I think predrilling and then using an electical knock out kit would be much quicker.
The only thing I would be worried about is flat spotting the rim but that is an excellent idea that someone should try out.
I use a swivel head duburring tool to get rid of the burrs. It takes about 2 min. per wheel and I think they cost $5.00 at Menards in the plumbing department.
DAMN! i wish i knew this tool existed!!! $5 f’ing $ would have saved me an hour a wheel!
Cool. I followed most of this example but will say that using a drill press and building a jig to hold the wheel were great time savers. Another local guy did the same but made the mistake of wearing gloves which got caught up in his drill press and mangled his hand. So no gloves, but wear some eye protection and ear plugs as the hole saw makes a hell of a racket 🙂
great blog post! I just got done doing a set of older speedway 100mm rims, the most labor intesive step is removing all the flashing, the drilling was the easy part. Also the cleanup was a bitch.
You could even drill smaller holes next to the ones you have pictured… to go real extreme, “if it doesnt fail after a ride, they you haven’t drilled enouph holes in it” or something like that 😉
I found that holding the wheel while drilling is easy. Remove the tire and put the wheel back on the bike. Use a tie down strap to hold the brake on so the wheel won’t rotate while drilling. Works great.
I am setting up to do a set of offset Large Marge rims will post a follow up when i am done
While a large drill press would be easier I fear the consequences of over pressure or catching, compared to hand drilling. Can anyone speak to this?