Sven and I present our 3rd video of the assembly and mounting bikes on the Saris Freedom Superclamp, for the Fat Hitch Rack Shootout. All of our testers have chimed in with their impressions of how each rack performed. As you may have gathered, this is all leading up to Saturday, when we reveal how each of our 4 racks stacked up against one another in a shootout with charts and numbers that should be somewhat reavealing as to which rack does what, best. So today, let’s take a look at the rack with the longest name in bike rack history – the Saris Freedom Superclamp 2.
Check out what our main man, Julio, thought of the ZooperKlemp (read that last part with a German accent)
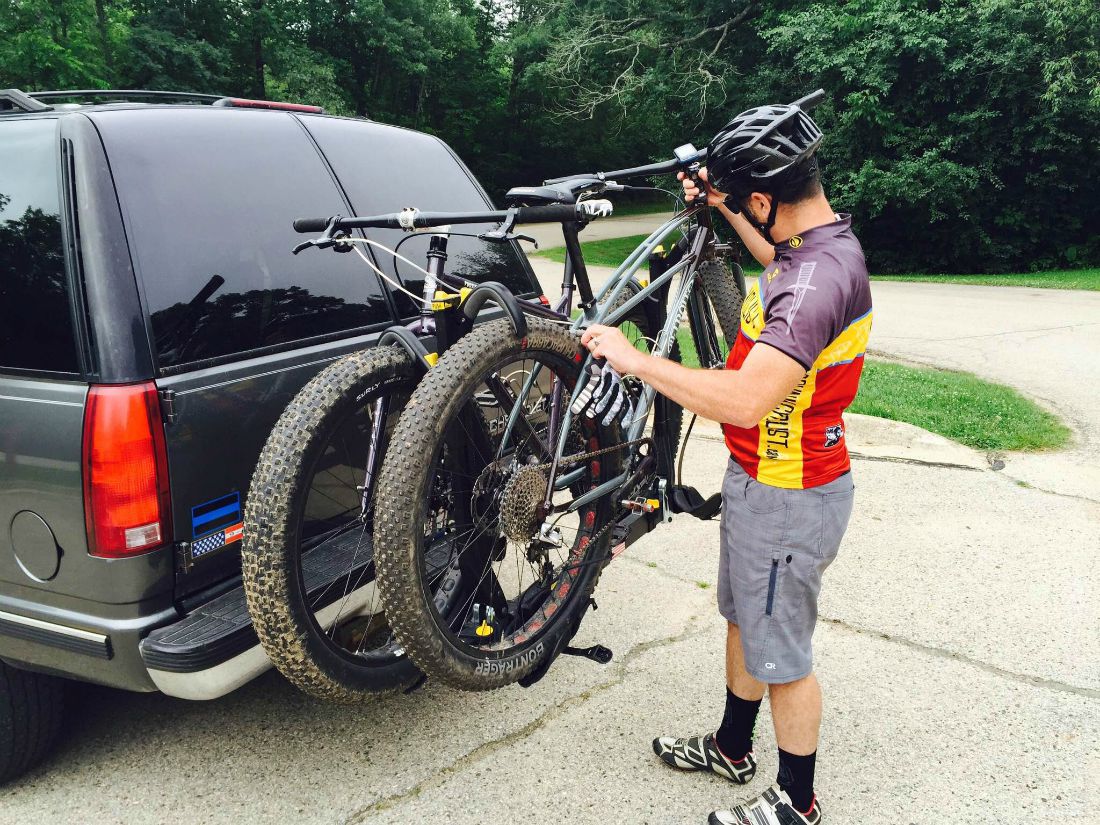
Julio rock’n the DC colors trying to extradite his Retrotec 29+ out of the Saris
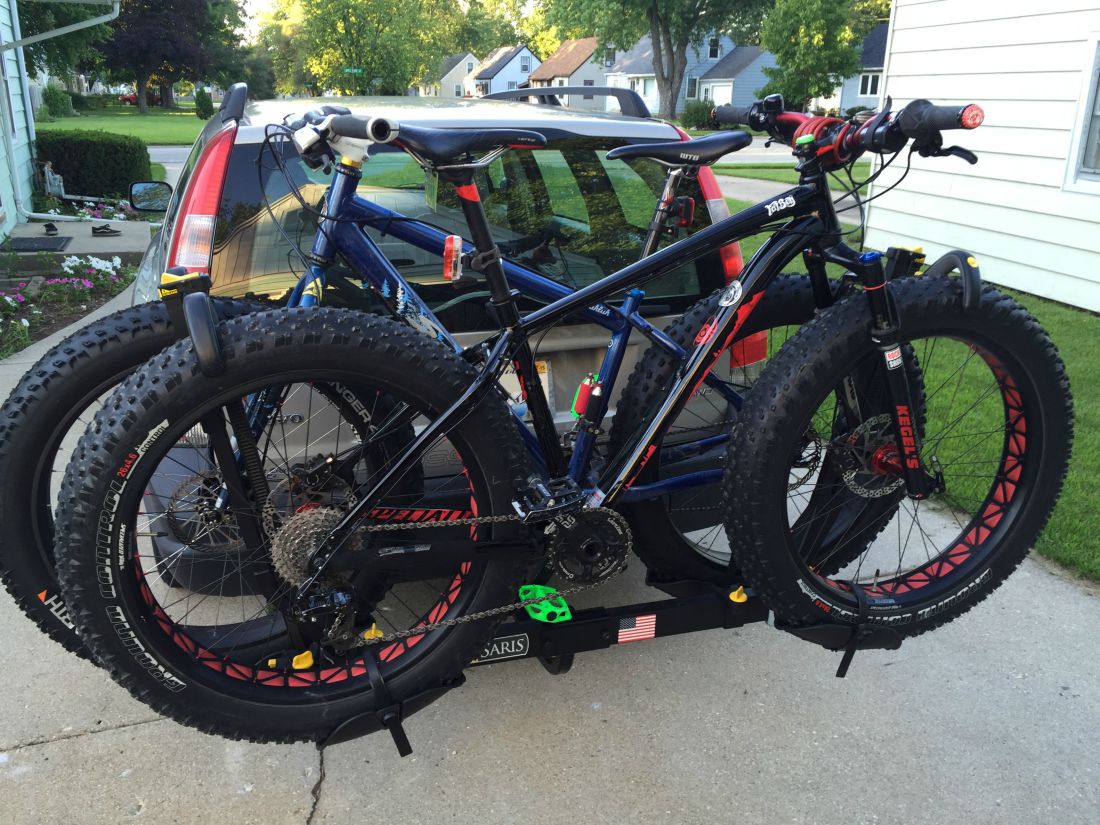
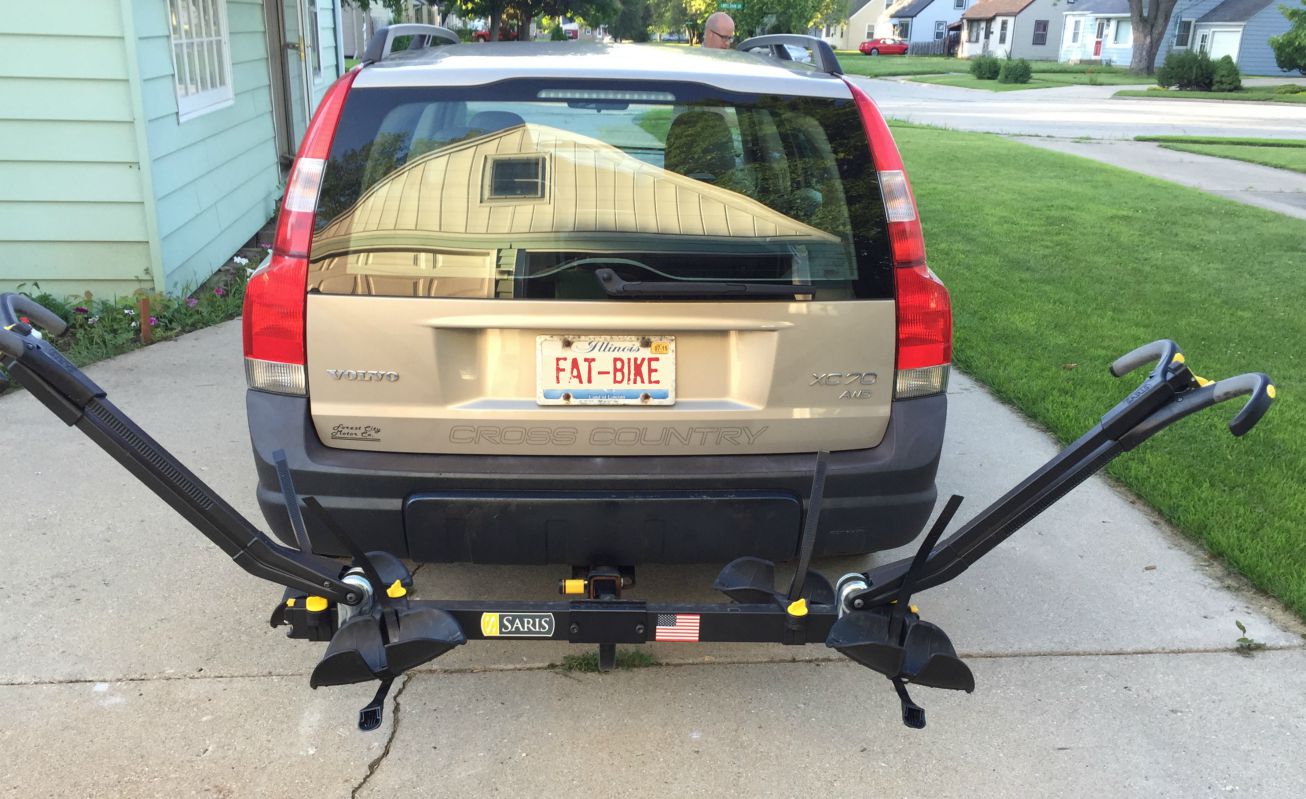
Saris Freedom Superclamp
The Saris rack is very simplistic with construction consisting of thin metal bracing and quite a bit of plastic. Installation was straightforward but unfortunately, it uses a threaded hitch pin, which makes easy on/off a bit of a pain and you’ll need to carry an appropriately sized wrench. However, the threading along with a locking hitch pin, make for some level of security. The rack also has a built in cable lock, that while not long enough to secure both wheels, gives you a bit of added protection. Due to its simple construction, the Saris rack is fairly light and has a very small storage footprint. Loading bikes was fairly easy but took a little forethought when loading two bikes. Once you properly adjust the wheel cups for two bikes, while a very tight fit, there is no interference between the bikes. If you carry a variety of bikes of differing styles/wheel sizes, this may mean having to adjust the wheel cups frequently, which could prove to be a bit of an inconvenience. The design of the rack relies solely on holding the wheels to secure the bike, which is nice since no part of the rack makes contact with your frame although there could be some rub on your fork and/or seat stays depending on how you adjust the ratchet arms to secure the bike. There are wheel straps, which are mainly there for a bit of assurance since the ratchet arms front and rear are what are really securing the bike to the rack. These wheel cup straps were of adequate length for larger sizes and widths. The straps aren’t the spring loaded ratchet style as found on other racks so I was skeptical of how effective they would be but they never loosed during my testing. Once loaded, the bikes were fairly secure but due to the nature of the hitch interface (i.e., no tensioning wedge), there is quite a bit of movement with the rack itself so those first few glances in the rear view mirror can be distressing until you realize the bikes aren’t going anywhere. I found no issues with carrying bikes of differing wheel size (from 4” to 1”) and all bikes where held equally secure. A major drawback I found with the rack is that it doesn’t have a tilting function, which means with bikes loaded you can’t access the rear of your vehicle if it has a tailgate. For a basic (plastic) rack and despite having a few flaws, the Saris does an adequate job of carrying bikes.
Next up on the Rack Review Rodeo is Mr. Scott Peterson…
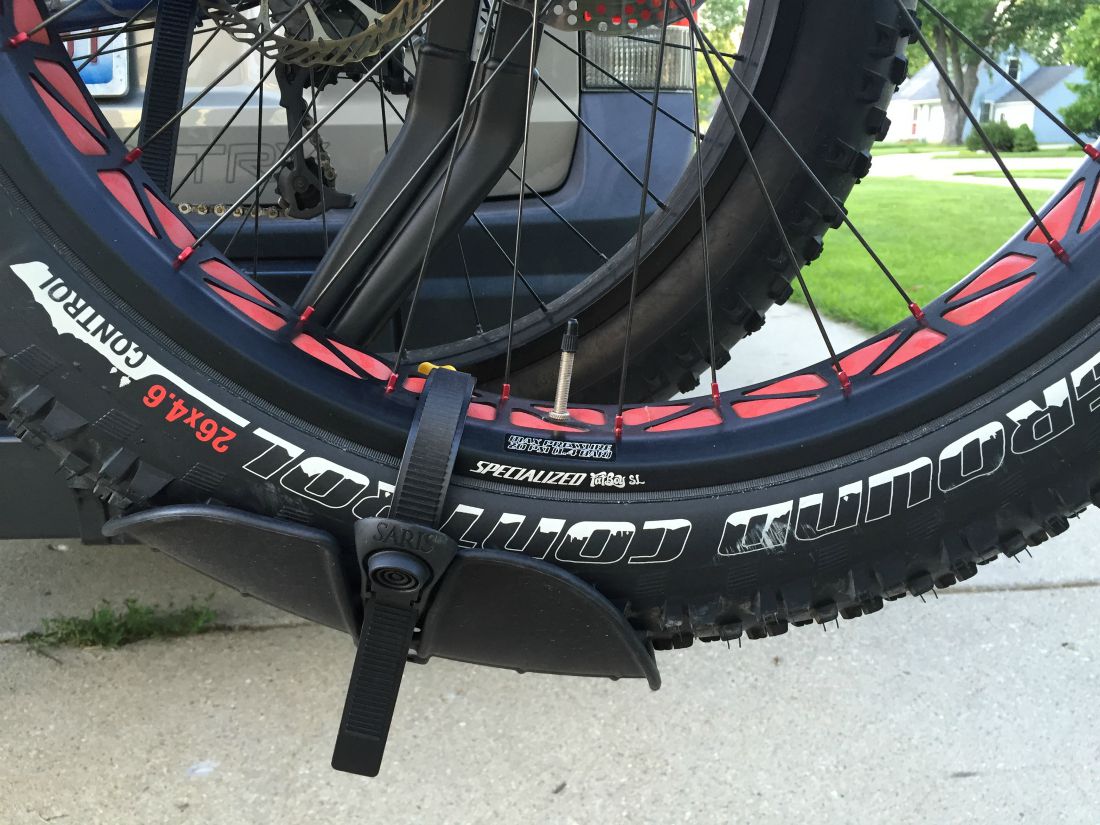
The first thing I notice about this Saris Superclamp 2 rack is its relatively compact size. The tire clamp arms fold down flat, and the optional fat tire holders do the job, while still holding narrow road bike tires easily. The whole thing only weighs about 30 lbs, far lighter than most racks I am used to. The tire clamp arms ratchet up into position easily and the bright yellow release buttons work well. I love the way the hooks on the arms only touch the tires, no danger of scratching or rubbing the paint. I did get it to work on a bike with fenders, by only clamping lightly on the rear fender. The rack arrived with the special Fat Tire wheel holders in place, an additional $45.00 per bike expense. The supplied straps were able the easily fit the largest 5″ tires, and he brilliant cutaway notch in the fat tire holder was easily able to hold normal MTB and even road bike tires.

- 4.8 inch Fat

- 29 Minus
On the road, the bikes seem very secure and the whole rack did not move around much. I did notice that the handlebars seemed to wiggle a bit more than some other racks, possibly due to the flexible nature of the fat tire holders. This did not cause any problem, so it is more of an observation. Although I missed the ability to fold the rack up close to the rear bumper when not in use, that allows the whole thing to cost less and saves weight and complexity.
Like most other hitch mounted racks, there is a threaded lockable bolt that holds the rack tight and prevents wobble. The Saris branded lock which was included was easy to use, and seemed to be high quality. There is even a built in locking cable that pulls out from the ends of the rack, and can be used to secure your bikes when you stop at a rest area or gas station.
This rack is a big winner in nearly every category. Light weight, many features, easy to use, and well constructed. There is even a MADE IN USA sticker on its back, another bonus.
Our Third test pilot is none other than Mr. Evan Larsson! Evan is getting married this weekend, so Congratulations to you on your Nuptuals Amigo!

Saris Rack review – by Evan LarSSon
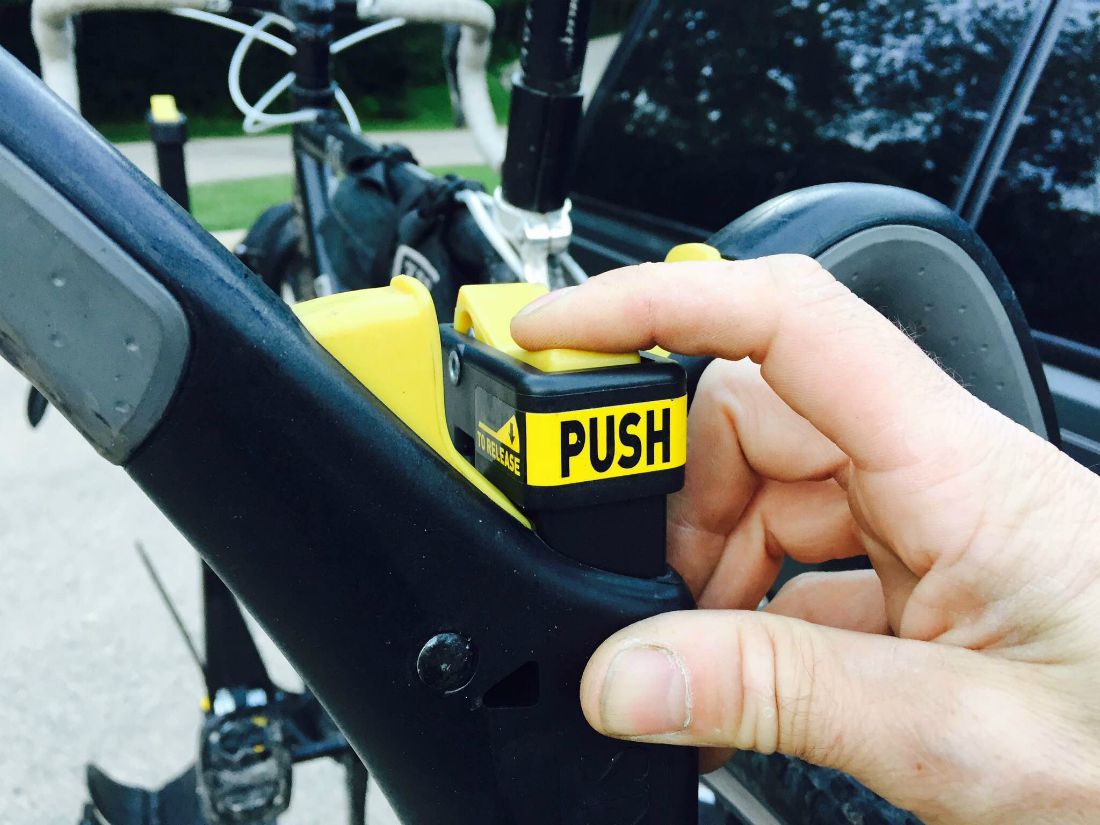
I want to start by saying the Freedom SuperClamp 2 is, well………. weird looking. It’s what I would refer to as a minimalist system because it cannot fold up (or down) to aid in getting into the rear of your vehicle. Weighing in at twenty nine pounds, it is the lightest of all the racks being tested. This rack comes with an adapter that fits 2″ hitches, is solid and made in the U.S.A. After securing the rack to my hitch, opening my rear door to throw the ratchet inside, I came across the first and biggest issue with this rack: the rear door cannot be opened more than a few inches. With my storage compartment rendered useless, I muttered my dissatisfaction with the design and moved on. If you have a lift gate, I’m sure it’ll work just fine. Two arms are folded down for a compact look. When you’re ready to use the rack, bright yellow buttons with “PUSH” are easily identified to open the rack to the ready position. The standard wheel cups provided WILL NOT accommodate Fatbikes. However, for an extra $100 you can purchase a fat-bike kit and the larger cradles will hold 5″ fattys’ all the way to your road bike skinnys’ due to the large wheelcup with a small groove in the middle.
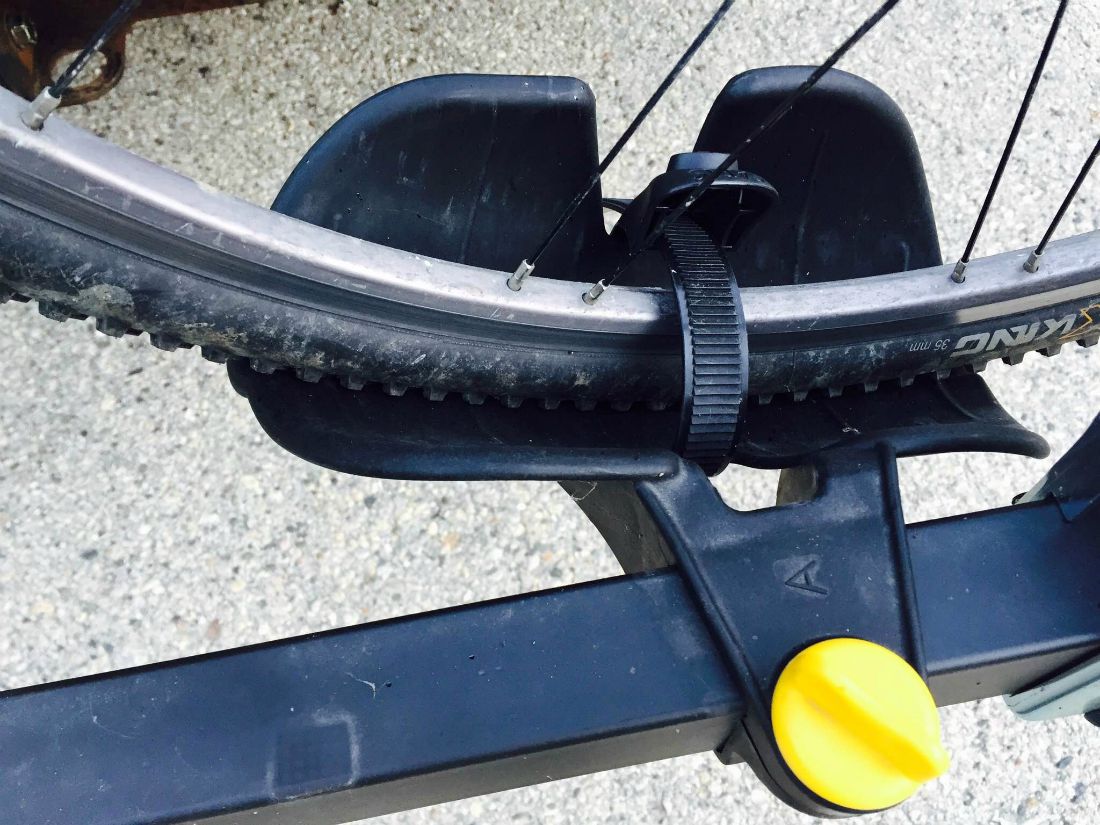
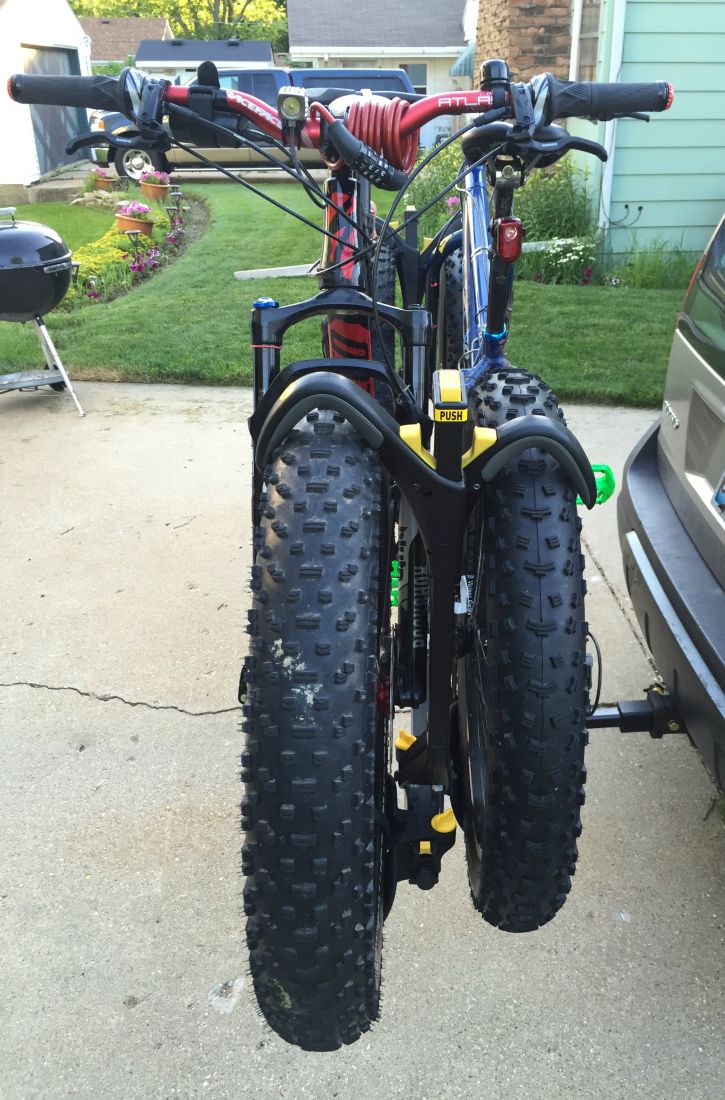
Loading fatty into the SuperClamp was fairly easy. With the wheel cradles on a slight cant the bike sets right in. The wheel cradles are easily adjustable to fit different bike sizes by loosening the yellow knobs and sliding the cradle wherever it is needed. After moving the arms into place, a large hook is lowered over the tires securing the bike to the rack. For additional stability the wheel cups have large buckles that don’t really ever get “ratchet” tight but they hold the wheels in place and that’s more than enough for this rig. Heading out to Juliodotcom’s place, I give the truck and rack a workout; Rolling the railroad tracks a bit fast and hanging some corners the Tahoe isn’t normally used to. With the wheels screaming at me, I peeked in my mirror to see the bike rack still there. I honestly couldn’t see the rack moving around any differently; it had the usual sway you typically see in bike racks.
Loading up Julio’s retro ride, I had to adjust the wheel cups a bit to help with the saddle / handlebar overlap, but again, a very easy maneuver. Another nice little touch are stickers that direct you as to which way the bike should be loaded; I won’t lie, it helps. With two bikes in tow I still couldn’t see an issue with movement even with the added weight. The newest problem came when it was time to unload. As Julio released the hooks and slid them up, the rear wheel was grabbing onto the rack. This could easily be fixed by lengthening the arms another two to four inches, but eventually the Saris let go. Again, a small learning curve comes with this rack; practice makes perfect.
Overall (besides the whole rear door issue) I liked the Saris. It is a solid platform for under $500. Even with the minimal use of materials, the “Made in America” sticker makes me feel all warm and patriotic inside. It has an integrated locking system that’s cool but it won’t make it through two bike frames. A simple solution would be to use a cable lock if you are planning on your bike being out of sight for an extended period of time. Lastly, don’t forget to add that extra $100 for larger cradles when you want to pull the trigger on this purchase.
My experience with the Superclamp was quite positive. I had watched the demonstration video of how the rack operated, in person, during frostbike and I think that helped me get acclimated to how bikes mounted more quickly that the other test racks. This was the first rack in my 5 rack testing rotation, so I really threw every curve at the rack that I could find. A wide variety of wheel sizes and tire widths can be accommodated by the superclamp, once the fat-bike accessory wheel cups are installed. I thought that the wheel straps on the Saris were the best and most intuitive of all of the straps that I’ve ever tested. The superclamp has a similar clamping arm to the 1Up USA rack with a couple of differences. The saris uses both a clamping arm and a wheel strap to hold each wheel and the (up & down) adjustment of the arm uses a ratcheted adjustment as opposed to the crossbars on the 1 UP that have to be moved up and down by removing them with tools and installing them in a set of drilled holes along the rack arms. It’s this additional (up & down) adjustability along with the addition of wheel straps that give the Saris a better solution for dealing with bikes with fenders and for dealing with bikes with much smaller wheel sizes, like kid’s bikes. Some might say the clamp arms plus the wheel straps are like wearing a belt and suspenders, but I prefer my bikes to stay securely attached to the bike rack, when I’m jetting down the interstate or bouncing down a jeep road. The saris uses more plastic than any of the other racks that we tested, however, upon closer inspection, all of the ratchet plates and other ares and made from metal. One thing that you should keep in mind is the fact that this rack does not fold up or down. So you may have to take the rack off of your vehicle to fit it into the garage and you probably will lose access to your rear door, when the rack is in use. Saris is made in the USA, near Madison Wisconsin. The MSRP of this rack is $430 plus the added $100 for the fat-bike kit which puts it in the middle range of the racks that we tested.
A side note about Saris : Sven and I got to meet the owners of Saris at Frostbike and It’s a family owned company that still makes their products right here in the USofA. Saris is very supportive of the Wisconsin Bike Fed, and this weekend they are hosting a gala to support trail building and bicycling infrastructure in the state where both Sven and I live, ride and work. – Way to go Saris!
For further information about Saris visit – www.saris.com
I have the 4 bike version of this rack and it fold up and tilts away to allow opening of the back. I’ve hand no issue carrying four fat bikes! I do agree that it needs a better anti-sway mechanism.