Please welcome one of our newest Bike Black Ribbon Test Pilots, Ken Blakey-Shell. Ken will be testing gear and sharing his adventures and racing from the fat-bike paradise of Northern Michigan and beyond!
Written and photographed by : Ken Blakey-Shell
Right now in fatty world, options are one of the biggest “issues” a fat biker has to sort through when getting a new bike. Obviously there are tons of ways to outfit a frame but that frame design really defines what options you have down the line with the bike. Some of (but not all) the questions you may weigh out for your rig include:
-
3.8” tires or 4.8”?
-
26er fat bike or 29er+?
-
170mm rear wheel spacing or 190mm?
-
“Snow” geometry or “trail” geometry?
-
Single speed capability?
Lets face it, you can’t have it all but how much flexibility can you have out of one bike? That is what I set out to discover with my new fatty. My new titanium Quiring is setup to run 4.8” tires on 80mm rims with no drivetrain modifications, belt drive or 10-speed, summer or winter geometry and finally 26er fat bike wheels or 29er+. Covering all of these variations would entail a very lengthy article so the scope of this write-up will only cover the snow vs. trail geometry. Switching between any of these other setups has been refined to a 10-15 minute process so it is fairly quick and easy for me to make any of the modifications listed based upon what I plan to ride. I hope to do a write up about some of the other variations in the future.
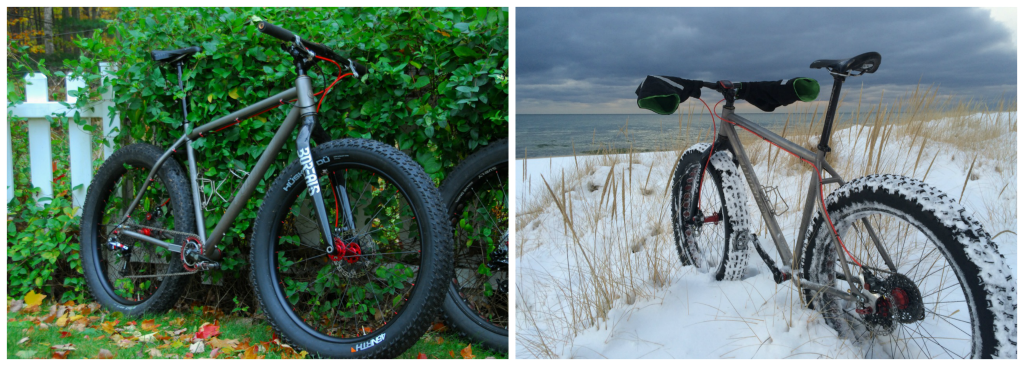
Summer Fatty vs. Winter Fatty
Fat Bike Geometry 101
“The one bike to do it all” question is something I had debated for hours on rides over the last year with my friend and frame builder Scott Quiring. Like so many other people, we have both found ourselves riding our fat bikes far more than we ever imagined. Because of this, our fat bikes which were designed to ride in snow and sand have not been that ideal for a lot of the riding we have done on trail. This has prompted us to discussed the pros and cons of four season use of fat bikes that handle more like a mountain bike.
“Snow” geometry tends to be slower handling and more stable. This is because snowy conditions tend to be slippery and the bike is doing all sorts of stuff underneath you as it hits frozen ruts, switches from a patch of crusty snow to soft, goes over sections of ice… If you have a fast handling bike you will need to respond more to all of that stuff going on under tire. With a slower handling, more stable bike you can relax more and let the bike just dampen out irregularities, leaving you to plow through stuff.
Once you get to summer, you can see more of the features of the trail and having a responsive bike allows you to “work” those trail features to gain speed and/or pick a smooth line. Additionally, with the super traction of the fat bike tires, you can rail corners far faster than a normal MTB. On a slower handling, very stable bike you have to aggressively lean the bike over in tight corners to get it around and if you are on tight singletrack you may be limited in how far you can lean the bike by trees (and therefore how fast you can go in the corner). A faster handling bike can get around tight corners while staying more upright allowing you to take advantage of the incredible traction of a fat bike.
There are lots of ways you can play with the geometry of a bike to make it faster or slower handling. Two primary factors are the wheelbase (longer wheelbases are more stable) and head tube angle (slacker is more stable). You can also lower your bottom bracket (which lowers your center of gravity) to make a bike more stable but you will run into issues both during the summer and winter with pedal clearance. Fork rake also plays into this but to keep things from getting crazy geeky I am going to skip that aspect because most forks available are similar in rake.
To get your more stable snow bike geometry, you need a longer wheelbase and slacker head tube angle (around 68-70º). Your trail bike geometry needs a tighter wheelbase and steeper head tube angle (71-72º for a singletrack rocket). Luckily there are two technologies that allow you to play with those dimensions: Adjustable dropouts (in my case Paragon Machine Works sliders) and angleset headsets (in my case the Cane Creek AngleSet).
The 3-in-1 Bike By the Numbers
To maximize the performance for 365 riding we designed the bike around three different wheelsets: 1) a summer set-up narrower rims (Velocity Dually) and 3.8” tires, 2) a winter setup with 80mm rims (Surly Darryl) and 3.8-4.8” tires, and 3) a more experimental 29er+ setup that could be ideal for certain specific conditions where float wasn’t as important. The 29er+ setup is going to be a summer thing predominantly so I am holding off on building the wheels for that setup until spring.
Our goal was to make the geometry of my new fat bike adjustable enough so that I could have almost exactly the same geometry as my 29er on one extreme and my old fat bike which is designed for snow riding at the other extreme. Living in the midwest, almost all of my trail riding in the summer is singletrack so my 29er is setup for fast handling in tight conditions and has a 44” wheelbase with a 72º head tube angle. My old fat bike is setup with a 70º head tube angle and 45.5” wheelbase which has worked very well in snow because the bike feels stable but isn’t so slow handling that it is a pig.
A quick note about me and where I predominantly ride. I am a big guy at 6’4” and just under 200lbs so I normally ride around a 21.5” bike and need it to be fairly stiff and durable. I also have a fairly long upper body so I need a stretched out top tube (25.75” on my 29er and 26” effective length on my fatty). If you are seeing my wheelbase length and thinking it is long even in its short setup, it is because it is a big bike. Also with the head tube angle on my 29er, some people may think 72º is crazy steep and it kind of is. I live in an area with a lot of tight singletrack so my bike is optimized for those conditions. Based on your size and your trail conditions, you may have VERY different geometry needs.
The Cane Creek AngleSet I am using is designed for a 1.5” head tube and 1 ⅛”/1 ½” tapered steerer fork. There are other models available including one for 44mm head tubes and straight 1 ⅛” steers (popular on a lot of fat bikes). The model I have allows you to adjust the headset angle either +/- 0.5º, 1.0º or 1.5º. Scott designed the head tube angle on my bike to be 71º so with this headset I have a range of head tube angles from 69.5º all the way up to 72.5º. Not sure how much I will actually use those extremes but I definitely plan to test them out.
Changing the head tube angle also changes the wheelbase somewhat with the wheelbase 0.6” longer at 70º than at 72º. Another major contributor to wheelbase changes are the Paragon sliders which have 0.8” of travel. Based on these factors, my wheelbase is 44.1” with the 72º head angle and sliders in the furthest forward setting and 45.5” with the 70º head tube angle and the sliders as far back as possible.
Based on our goals for the geometry numbers, mission accomplished!
Enough Geeking Out, How Does it Ride?
Early indications are that we nailed it! Scott had my frame built around October 20 so I had a chance to ride it on buff clean singletrack before the leaves really dropped and it also got a good test at the Iceman Cometh race. Just recently we got 10+ inches of snow so I have had some time to play in the snow too. This doesn’t constitute an extensive amount of testing at this point but is enough to get a good feel for the bike and compare it to my two benchmarks (my 29er for summer setup and my old fatty for winter).
In “trail” geometry (72º and 44” wheelbase) mode the bike feels very similar to my 29er but with crazy traction and a bit slower acceleration due to the wheel weight. On tight trails I can fly around corners at unnerving speeds. I wish I had gotten to ride it more on buff singletrack because I never really found the edge of what the bike could do. Even after 50+ miles of riding I was still playing the mind game of “this feels WAY too fast but don’t touch the brakes for this corner” and then exiting the corner thinking “I could have gone faster.” The bike is truly “scary fast” and I look forward to spring when I will be able to really test the limits of this setup.
I also rode the “trail” geometry a few times in the snow to see if the fast handling was really as sketchy as I thought it was going to be. With just a couple inches of snow on dirt it was no biggie but once it got over 6” of snow where many of the trail features were completely obscured, I was all over the place. I just couldn’t hold a line well enough to ride efficiently and it took a lot of mental effort to just ride down the trail. Ditto for riding in a couple of inches of fresh on top of hardpack snow. Since it took just slight motions to turn the bike I kept breaking free of what little traction I had making it next to impossible to feather that line between grip and slide.
In “winter mode” (70º and 45.5” wheelbase) the bike feels just like my old fat bike. It is stable enough that minor body motions and/or trail features don’t throw the bike off and get all squirrelly. I also feel like it plows through things well allowing me to relax more and just keep the wheels under me. I am going to play with the 69.5º setting too because there are times riding in deep fresh snow where I think even more stability could come in handy.
Wrenching and The AngleSet
A lot of people are familiar with the Paragon sliders or other similar designs so that isn’t very unusual but the AngleSet is something that most people haven’t used or seen. Because of this, I thought it may be important to run quickly through how it works and what is involved with changing the head tube angle.
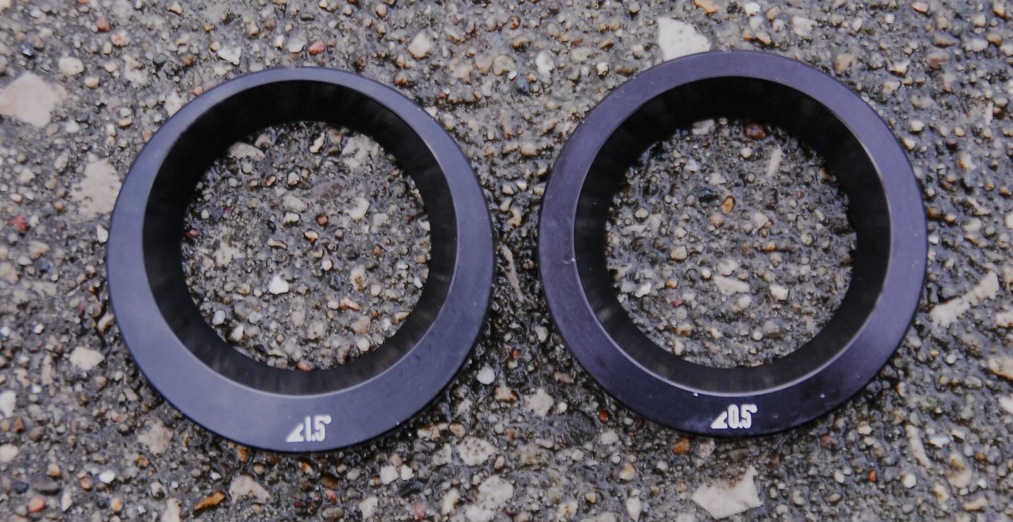
The AngleSet I am using comes with a series of cups that allow you to adjust the head tube angle by +/- 0.5º, 1.0º or 1.5º. The amount of angle change is determined by how offset the center “hole” is within the cup. Below are pictures of the 0.5º and 1.5º cups. Note the difference in offset of the center “hole” compared to the outside of the cup.
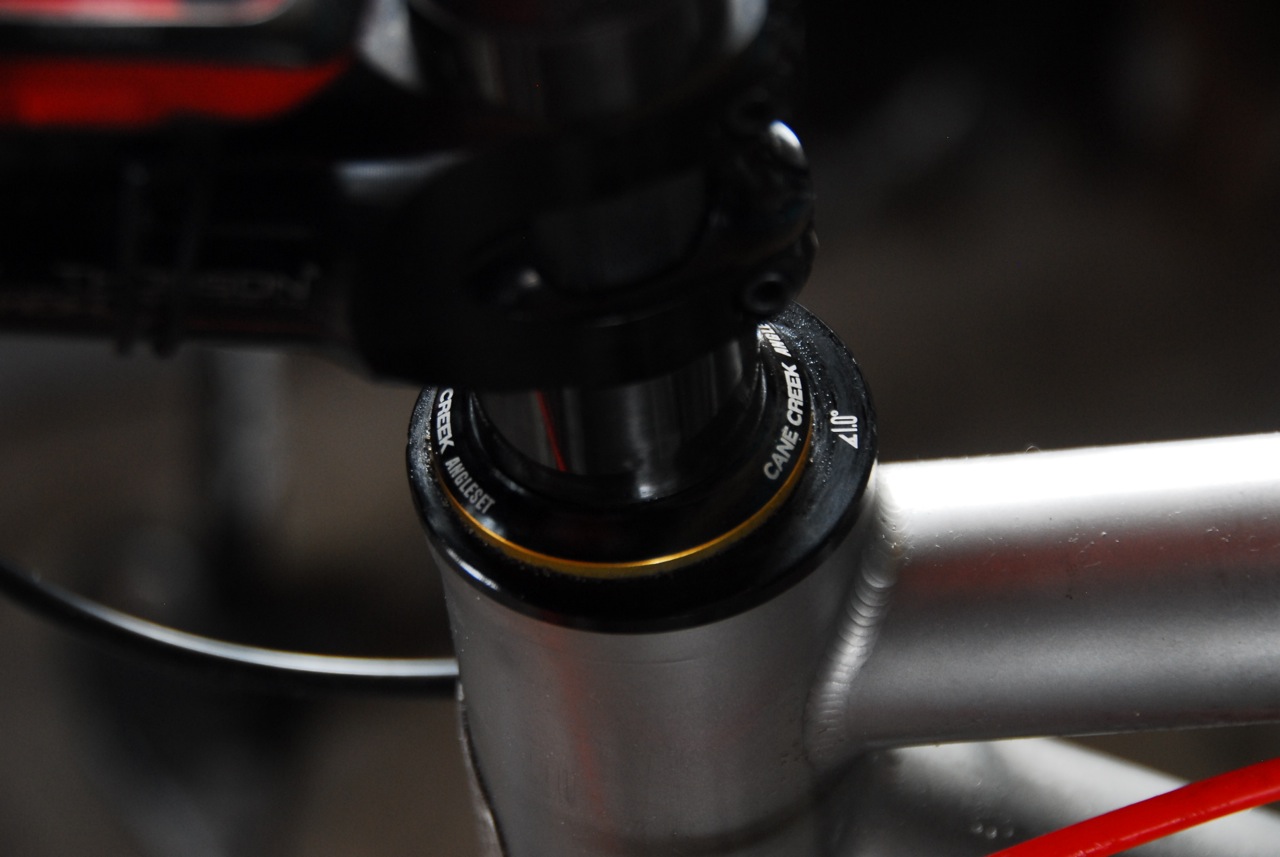
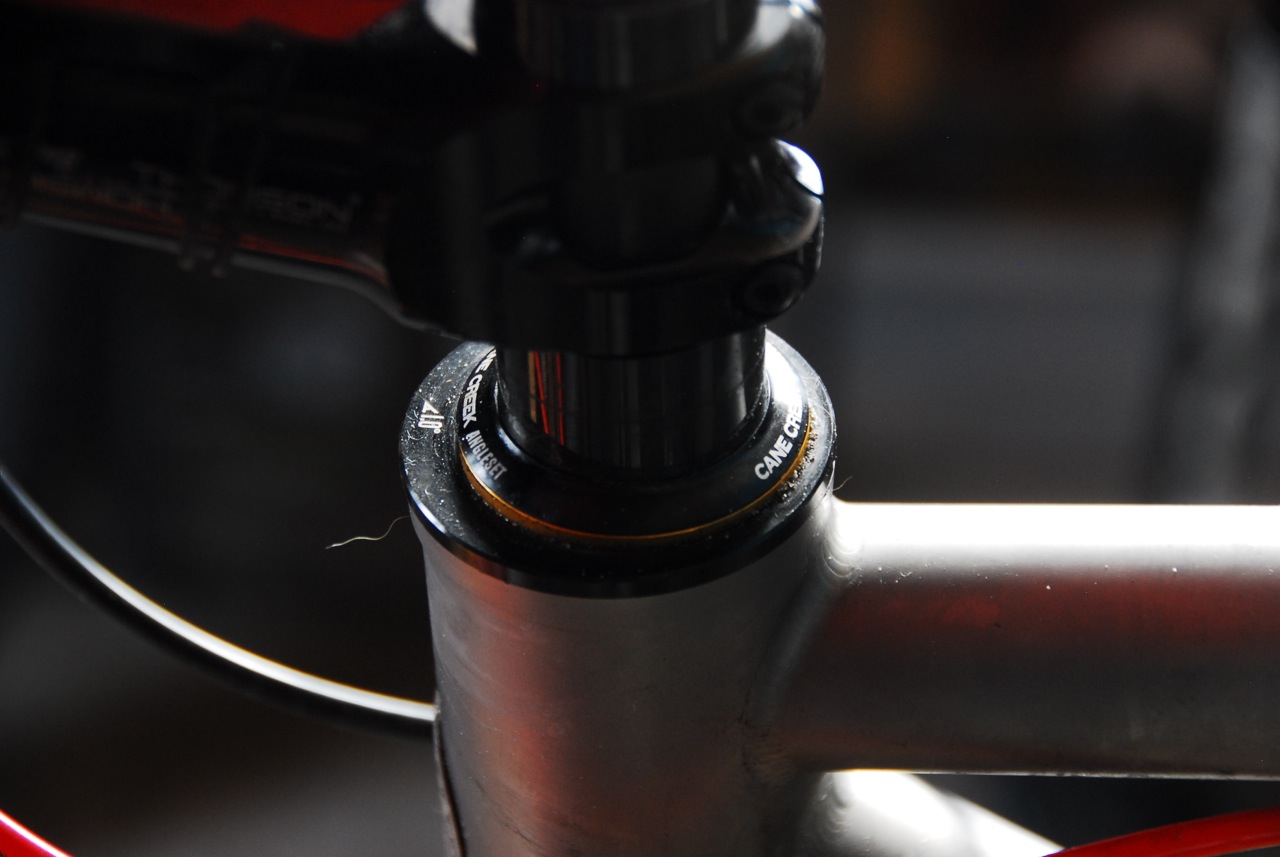
The hole through the cups is actually the “socket” in a ball and socket joint that allows the bearings to properly orient themselves within the cups. You can adjust the headset angle plus or minus the number of degrees printed on the cup based upon if the cup is pressed into the frame in the forward or rearward offset position. For example, in the below pictures the one degree cup is in the +1.0º setting the in the left picture and in the -1.0º position in the right.
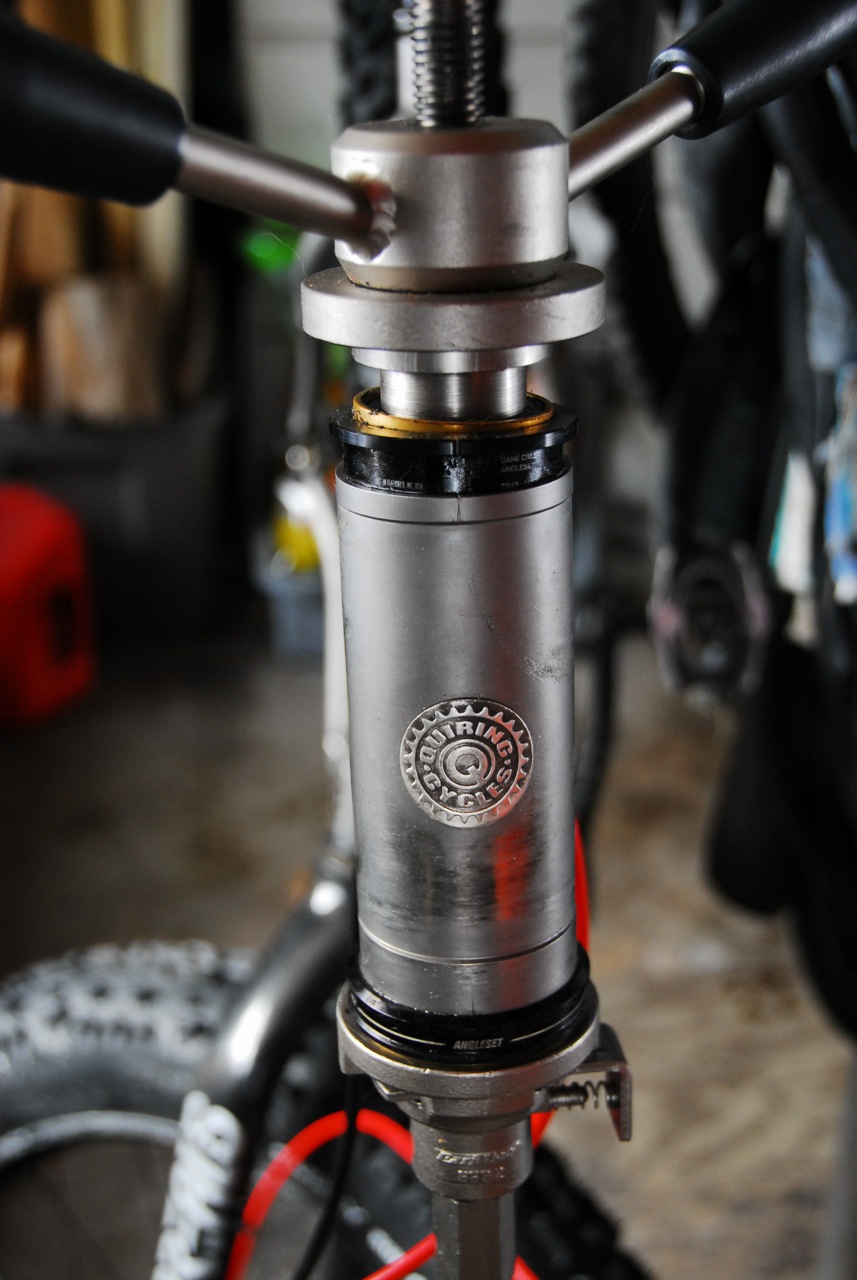
The process of taking out the cup and putting it back in is straightforward and quick (took me less than 10 min including time taking these pics) but does require a headset cup removal tool and a headset press. Neither of these items are in a lot of home mechanic’s tool kits, but they are standard bike shop tools. This shouldn’t be a big turn-off for most riders that want to try this because you are not probably going to be switching the head angle on your bike all the time. Yeah, I am going to play around some and try out different angles for different conditions but really you only need to change the head tube angle twice a year. Once in the fall to go from summer to winter geometry and then vice-versa in the spring.
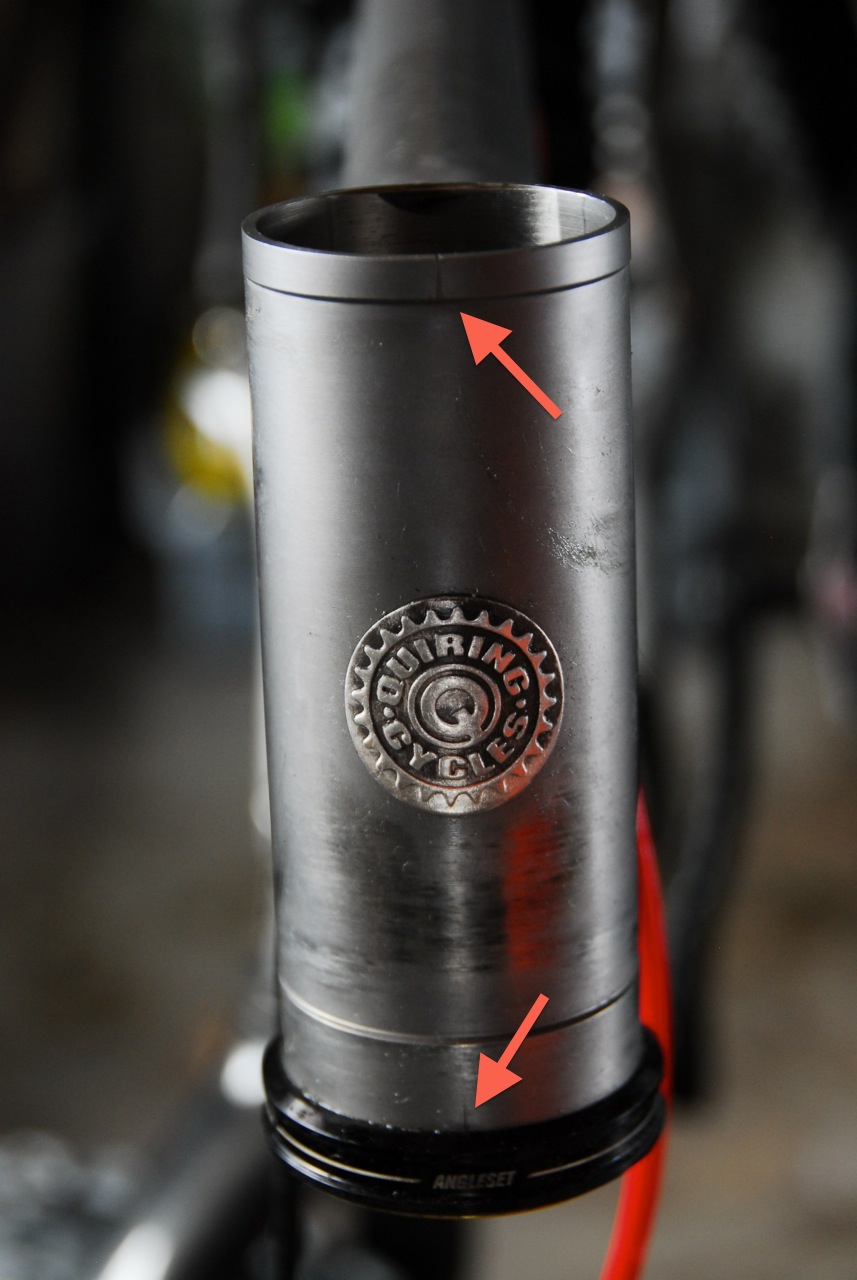
Scott Quiring did include a nice feature on my frame to ease installation. After building the frame he put it on his alignment table and scribed centerline marks on the top and bottom of the head tube. This gives a nice reference mark to assure you are pressing the cups into the frame in the proper orientation. There are corresponding marks on the cups so you just need to line them up and you are good to go.
There are “Bigfoots ” in stock where you are? I’m still waiting since August for mine! Norco is on their 3rd frame design since the “beer run “video. Wonder what it will look like when it finally arrives?
Nice job Ken!! I thought I recognized that bike!!
Great article! I love the do-it-all flexibility you guys designed in there. My favorite material (Ti) on top of it. If I ever get the money I might have to get me one of these. Only thing I would change is to use a bent seat tube, if Scott can work that.
Not nearly enough photos!
Great article for me! I am 6′ 5″ 210lbs and I am researching my next fat bike. I have riding an original Pug built in 07 and recently acquired by me from a family friend. I live in Minnesota and most my summer riding is single track. It would awesome to have a fat bike that would work well in winter and summer. I will be calling Quiring for more details soon! Thanks, Rob