I know that bars like the Jones loop have been around for a long time, but I had never really given one a chance. I ride flat or low rise bars with 9/10 degree sweep for fat/mountain biking, but my current routine includes a lot of asphalt, gravel, and dirt. I live on the Glacial Drumlin Trail, so vanilla gravel miles are always there for the taking. I’ve got a black Surly Krampus with a 1×10 XT drivetrain that’s really well suited for that sort of mixed bag of ‘road to trail’ that I ride from my front door. This is the bike that’s served as my summer season “mountain bike” for the last couple of summers. I’m riding a Fatback Corvus FLT set up with 27.5 x 3.8″ tires set up on a 50mm wide set of Borealis carbon wheels as my “MTB” this summer, so the Krampus has become the “Jack of all trades” bike.
My only experience with this category of handlebar was last winter when I was testing the new Pugsley and it came equipped with a Surly Moloko. The Moloko Bar was one of the bright spots of the time spent on Pug 2.0. That loaded ride experience planted the seed to conduct this experiment with a set of Jones Loop bars. The idea of multiple hand positions on longer bland gravel rides made sense and I found that I could handle some easy singletrack when I choked up on the grip.
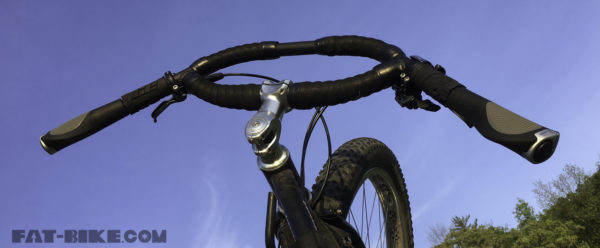
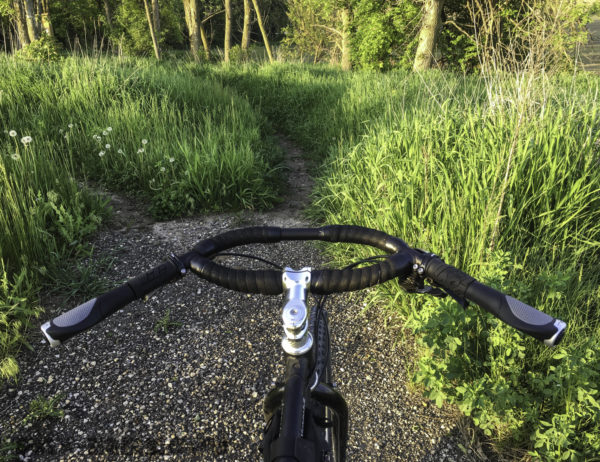
With plans for some gravel bivvy action I called my amigo Adam Blake down at Gravel City Adventure, out in Emporia Kansas and he set us up with a 710 mm Aluminum Jones Loop Bar, some velvety Salsa Bar Tape and a set of Ergon GC 1 grips. We bought the $119 aluminum bar because the Carbon loop is $315 and the Titanium one is $425. I’m not even sure that the Jones bar is the ultimate set-up that I’ll be happy with, in the long run, so it made sense to try to be fiscally responsible.
I kept the same stem and mounted up the new bar. At first I ran the levers and shifter out towards the Ergon grips. Then I read the instructions and moved those controls nearest to the loop. I added a trimmed set of good and evil grips to cushion the space between the Ergons and the levers. This meant that I didn’t have to lengthen the brake and shifter housing (bonus!). The idea is that when things get rough, your hand position would move off of the comfy bar ends and to a more aggressive position on the bar, right where the brakes and shifter are positioned.
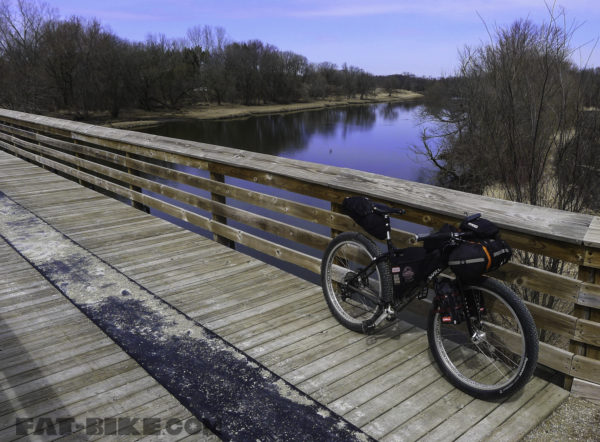
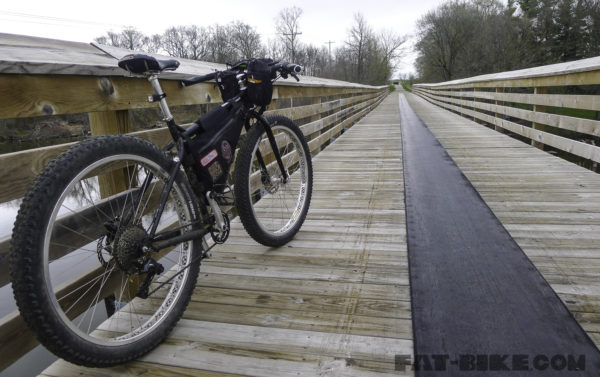
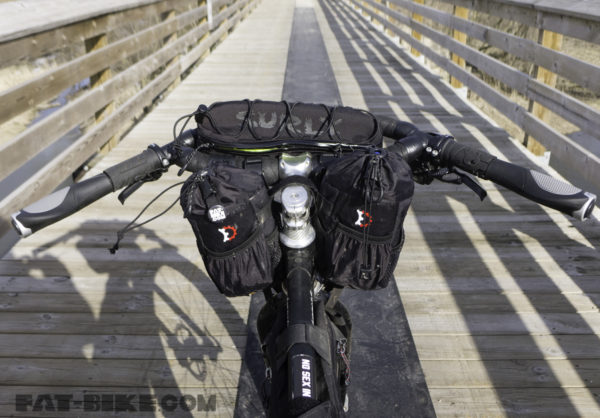
The loop bars play well with a number of different bag set-ups. In the photo (above) the Jones Bar is hanging out with Gnomie Award Winner – The Revelate Designs Mountain Feedbags and the Surly Moloko Bar Bag. The Surly bag seems to get in the way of utilizing the loop section of the bar for extra stretched out hand positions and the zippered access to the main compartment is cumbersome to get things in and out. I like the functionality of the shock cord attachment on the top of the Surly bag, but when you cinch that cord down, it makes it even harder to access the main compartment. I like the added hand positions that the loop offers, so the Surly bag is getting traded to Cleveland.
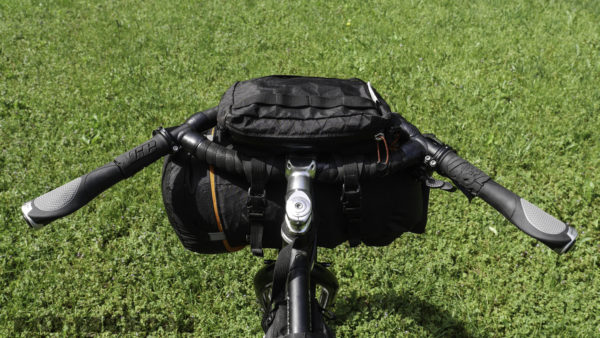
The Jones Loop Bar works exceptionally well with my Oveja Negra Front End Loader. The front end loader holds a dry bag in place below the handlebars and the additional front loop section of the bar stabilizes the load and keeps it from rubbing on the front tire easier than on a flat or riser bar. It also offers a spot to attach a light at the front of the loop. With all of this extra bar real estate, I still haven’t mounted a bell, but I think I see a spot near the left brake lever that I can wedge one in.
I still don’t think that I’ve got this set-up perfectly dialed. The new bar and grips are comfortable for a couple hours and then my hands start to hurt. I don’t know if it’s the angle of the bar or the angle of the grips that need tweaking…or if I just need to adhere closer to rule #5 and HTFU. Either way, at least I have a couple different hand positions to switch out the pressure points with this new set-up. If you have tips on how you’ve set up the grippage on your loop bars, please let us know in the comments or send us an email with a photo of your set-up to gomez@fat-bike.com. I’m going to continue to make adjustments and hopefully negotiate a compromise agreement between comfort and rule #5 somewhere out on Wisconsin’s dusty gravel and trails!

long-term jones loop user. I tinkered for months when I first got them. eventually, I tried them upside down and they’ve been that way for 6 years. definitely recommend it as an option.
Take a level off your seat to the bars and make sure it is at least level to bars a smidge higher. The Jones or Moloko bars don’t work well with the them lower than seat. I have experimented with this for years and fine the comfort really comes in when a bit higher than level. Jeff Jones will tell you the same thing..
Another long term Jones-bar user. Try rotating the bar to angle the ends of the bars more downward. This will give you a “higher” position in the center and a “lower” position at the ends.
The other change you might make is to use a shorter stem, which seems counterintuitive, but will move your weight off of your hands and allow you to better use all of the hand positions. You will be more upright when you are on the ends of the bars, but will be able to stretch out in “aero” position when your hand are on the center loop.
Also, email Jeff as he might have thoughts on this.
I’ve been wondering about a Bar set up that would go like this. Start with a flat bar and going from the outside in. Add grips, then bar ends, then shifters and brakes, then tape the center section. Basically the bar ends would be inside the grips and the center would be taped. I think it would provide for multiple ways to grab the bars and relieve hand fatigue. What do you think?
There are some really good suggestions here! Thank You!
Really interested in this article.
The Pugs 2.0 with the Moloko bar also got me thinking about my own Pug set up.
I looked around at my options and spotted the Love Mud Confucious from UK based Alpkit.
I liked the fact they had a more traditional mtb bar feel but with the loop giving options.
The downside was the additional stiffness many reviews picked up on. But with my usual 5 or 6 psi it hasn’t been an issue for me.
Dude, I only wish I was as cool as u!
Buying some for my old Pug!
I too am an extreme fan of Jones bars; they are on both my 29er and fatbike. I have recently converted to his new riser version, which has been an additional benefit to the relief of a right arm issue I live with. I totally agree with angling the bar down a tad. Grips are definitely a challenge finding the right style that works for the individual. I don’t wrap the rest of the bar for preference of an insert bag. Broadfork Bags makes the “banana hammock” that is cut to fill the loop completely, and if you are tired of black he can do colored fabric. I am using my second one and am very pleased with the construction.
After using a level like Ron suggested I ordered a new stem to try to raise the bars up about 3/8″. Picked out a Paul Components Boxcar Stem 70mm with 15-degree rise – replacing a Thomson 80mm with a 0-degree rise. I felt like I had too much weight on my hands and this should help with that. I’m adding some tape between the Ergons and the loop over the rubber grips and a bell. Then more gravel miles.
I’ve been riding deep sweep bars for years, On One Mary, Salsa Bend, even an old pair of Answer Enduro 29’s and found that an ergo grip with a big shelf just doesn’t work, too much pressure on the outside if the palm. I’d say just find a cushy grip that fits your hand, after all, you’ve got more than one hand position now.